
Yesterday, Apple introduced its new OS X Mavericks and distributed it to users for free. But not everyone immediately ran to the Mac App Store for the update, some decided to do otherwise and install the system from scratch. But there was a gag: how to do it? After all, for example, on MacBook Air or Mac mini of recent generations there is no drive for disks. And here we need the instruction how to make a bootable USB flash drive to install OS X.So, first we need a system distribution and a USB flash drive. Please note that although the system image is slightly more than 5 GB, the drive needs at least 8 GB. Also, better that it was USB 3.0, because on USB 2.0 flash drives installation will take a very long time. If in time you do not have problems, then you can use older versions of USB-drives.
Now let’s go directly to creating a bootable USB flash drive. This does not require any tricky manipulation.
And now, on points:
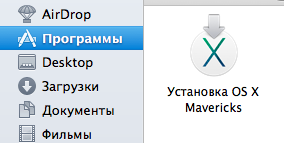
1. Download the system image. It will be available in the category of updates for the Mac App Store, and after the download is complete – in the “Applications” folder.
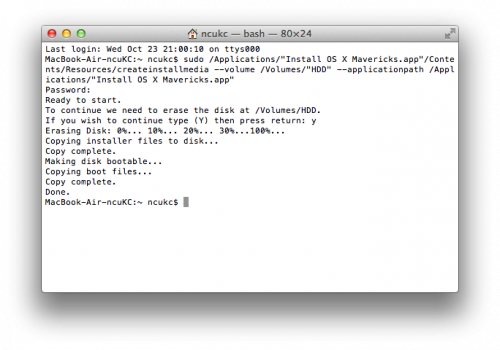
2. Open the Terminal (Programs – Terminal) and enter the following command:
sudo / Applications / "Install OS X Mavericks.app" / Contents / Resources / createinstallmedia --volume / Volumes / "USBDrive" --applicationpath / Applications / "Install OS X Mavericks.app"
Please note that instead of “USBDrive” there must be a name for your USB stick. This command will create a partition on a removable disk, copy the installation package and make the flash drive bootable.
 3. We wait until the end of the process and see that the Mac OS X Mavericks installer has appeared on the removable disk.
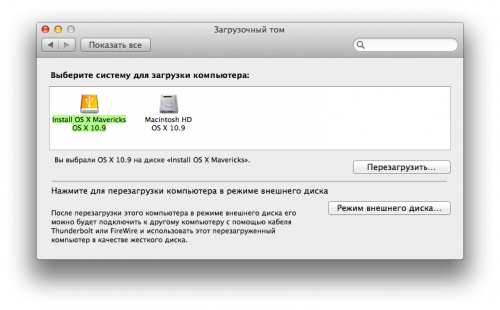
4. In this step, open the “System Settings” menu and go to the “Boot volume” section. Choose your flash drive, which is now called “Install OS X Mavericks OS X 10.9” and click “Restart …”
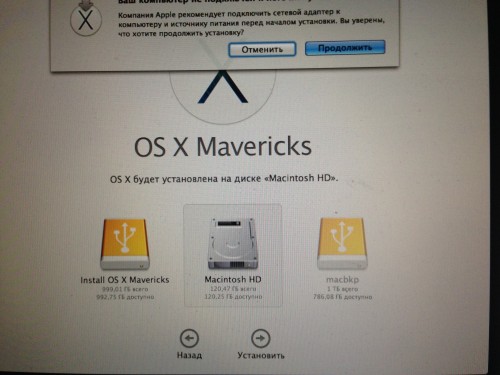
5. Now we are waiting for the computer to reboot and start the menu where you can manage the partitions of your disk (format, for example) and run the installer of the new system. Do not worry if the installation will “hang” for 1 second before the first reset. Just wait a while.
6. We wait for the installation to finish and enjoy the new system!
That’s all! Enjoy the new superb Apple OS.