All those who independently set up wireless networks know firsthand about the problem “here catches, but does not catch it”. Choose the best place for the router can only be experienced by moving it around the apartment and measuring the quality of the cover. To simplify the task, it will be more appropriate to use the utility for diagnosing NetSpot. With its help, you can do everything right the first time.

This application is designed to search for wireless networks and a detailed analysis of each of their many parameters. In Discover mode, NetSpot constantly monitors the air and displays a list of networks around you. It can be filtered by various parameters to find, for example, the load of a particular channel and to choose a free one for your network.
More interesting for us is the Survey mode, which allows you to conduct a full survey of your network and provides a detailed report of all its nuances. Let’s try to understand the possibilities of NetSpot on a concrete example – my dacha.

Following the prompts of the wizard, we select the type of room and sketch its scheme (you can import the finished file from the file). I’m not the best artist and did not quite guess with the proportions, but the main thing that we need to know is a total area of about 75 square meters.
Then start making measurements at different points in the room. It’s more logical to go to places where you use the Internet, so I started with the living room, checked the signal by the bed, in the kitchen, in the office, on the veranda and, of course, in the bathroom. The more points you add, the more accurate the result, so do not be lazy. After completing the measurements, click Stop scan and proceed to the analysis.

Based on the received data, NetSpot will draw a quality map of the coverage, that is, show where the Wi-Fi signal is strong, where – weak, and where it does not exist at all. The color spectrum is used for visualization. Just note that green means bad reception areas, not the other way around, as you might think. In order not to get confused, follow the scale on the bottom of the map.
If your network uses multiple access points, the signal from them can be displayed separately by checking the boxes next to the desired ones. This will identify the problem areas in order to move repeaters or add new ones for a more reliable cover. By the way, access points will automatically appear on the map, but if their location is not exactly determined (that’s why you need more measuring points), you can change it manually.
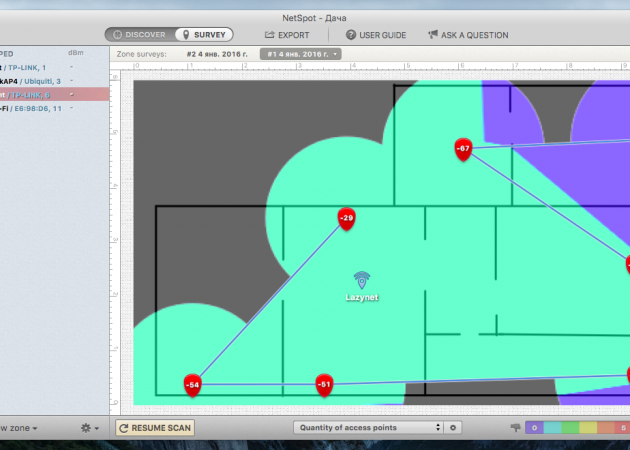
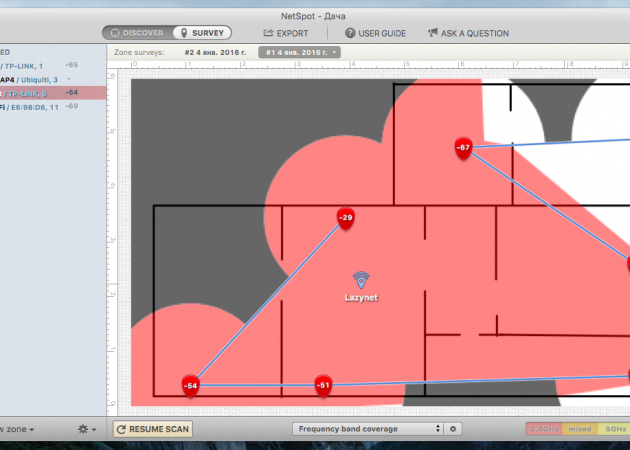
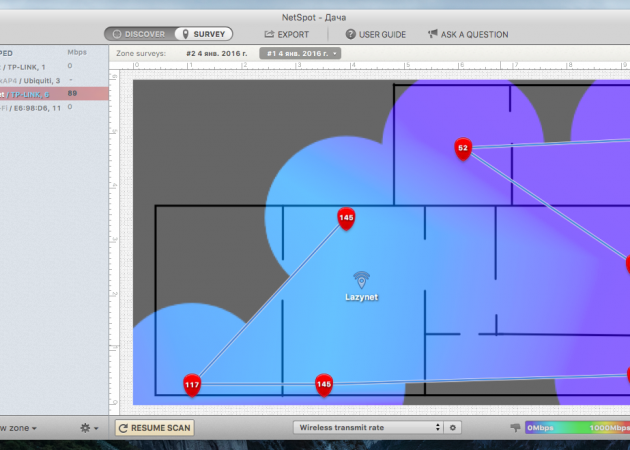
By default, the SNR value is visualized on the map, that is, the signal-to-noise ratio. This is the main evaluation parameter, but in addition, from the drop-down menu, you can select even more than a dozen others: the signal strength, the number of available networks, the level of interference, coverage at a certain frequency, download and transmit speed, power of access points, and others.
When building a network, you probably want the signal not only to be caught, but also to be at a good level. To do this, the dialog for changing thresholds of the signal level will be useful. By default the range is very large, the minimum level implies only connectivity and work at the lowest speed.

Clicking on each access point displays a menu with detailed information about it (channel, frequency, etc.). It will come in handy if you have neighbor networks in your house, and if there are access points in your network that operate in two bands.
All data are supplied with explanations (although in English). They will help you identify areas with a weak signal, determine the optimal locations for installing the router and, if necessary, repeaters.
In my case, it was confirmed the need to install one more access point for good coverage in the office. The signal is caught there, but the speed leaves much to be desired. I conducted testing in a private house with a minimum number of foreign networks, where the use of free channels is not so important. In urban conditions with a clogged air at 2.4 GHz, the importance of this nuance is difficult to overestimate. With NetSpot, you can identify the least loaded channel and switch to it.
The use of NetSpot on a non-commercial basis is completely free, but there are certain limitations that are of little value at home. The Pro-version offers an extended set of functions, including multi-zone projects, unlimited number of access points and measurements, data export, as well as recommendations for setting up and troubleshooting. There is such a version from 149 dollars. At the moment, the NetSpot utility is available only for Mac, but soon the release of the Windows version is planned.