Mac – this is a working tool for people of different professions. We use computers to write texts, edit photos, create applications and lots of other things. Like any work, the working process behind the Mac should be productive. Screen space is one of the most important factors affecting productivity. Some use external monitors, but what about those who can not afford such a luxury? For these users, we have some useful tips.
Activate the application switching menu
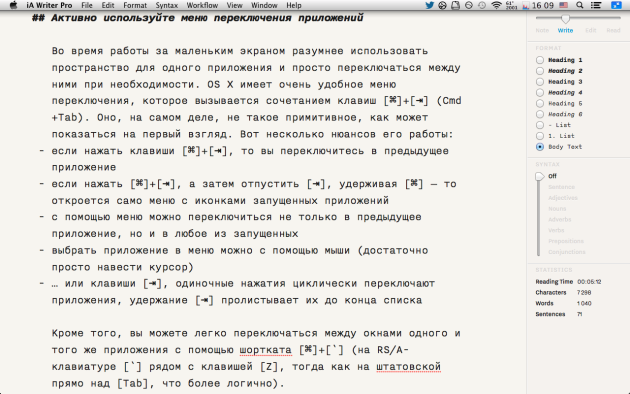
While working on a small screen, it is more reasonable to use the space for one application and simply switch between them if necessary. OS X has a very convenient switch menu, which is called by the combination of keys [⌘] + [⇥] (Cmd + Tab). It, in fact, is not as primitive as it might seem at first glance. Here are a few nuances of his work:
- If you press [⌘] + [⇥], you switch to the previous application
- if you press [⌘] + [⇥] and then release [⇥] while holding [⌘], the menu will open with the icons of the running applications
- Using the menu, you can switch not only to the previous application, but also to any of the currently running
- select an application in the menu you can use the mouse (just point the cursor)
- … or the [⇥] keys, single-tapping cycles the applications, holding [⇥] scrolls them to the end of the list
In addition, you can easily switch between the windows of the same application using the shortcut [⌘] + [~] (on the RS / A-keyboard [~] next to the [Z] key, while on the US directly above [Tab] , which is more logical).
Effectively use the available screen space
We have already reviewed various tools that allow you to more effectively manage windows in OS X. Among them, you can select Moom, BetterSnapTool and Window Tidy. All of them allow to manage the size and arrangement of windows with great convenience, pursuing the same goal – effectively divide the available screen space between applications with which you need to work simultaneously.
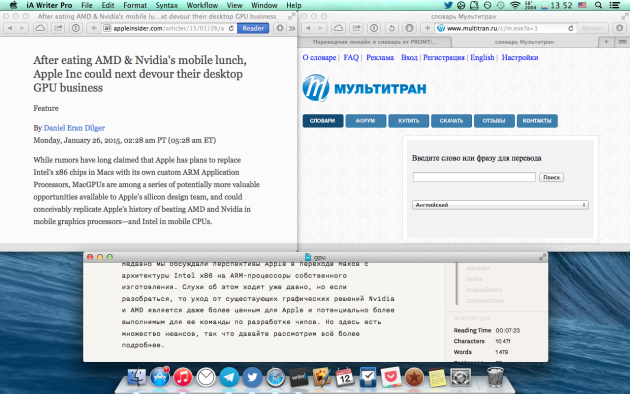
I will give an example. I’m working on a 13-inch MacBook Pro, which is not the smallest, but given the resolution of 1280 x 800 (which is even less than the 11-inch Air), it can be considered as such. When I translate large articles, for convenient work I need to simultaneously keep at least three windows – a text editor and two Safari windows with the original and the dictionary or translator window. Manually adjusting the size of windows and placing them on the screen in the right order is a very thankless task, so I use BetterSnapTool, which has many options for both the size of the windows and their location.
Configure the desktops and separate the workspace
Support for multiple desktops in OS X is a standard feature and has been implemented for a long time. You can create as many virtual desktops and easily switch between them.
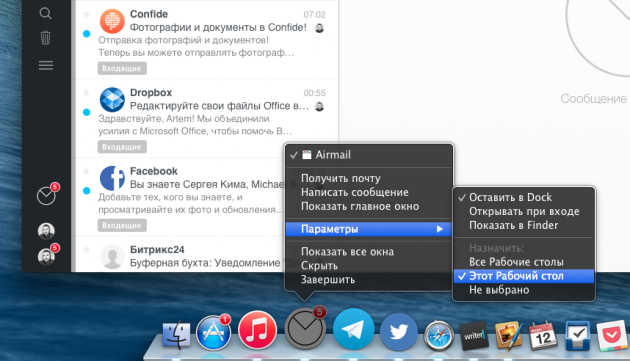
The idea is to differentiate your workspace. The system allows you to tie each application to a specific desktop and thereby reduce confusion and chaos. You can assign the desktop to the application by right-clicking the menu on the application icon in the dock and selecting Options ▸ This desktop.
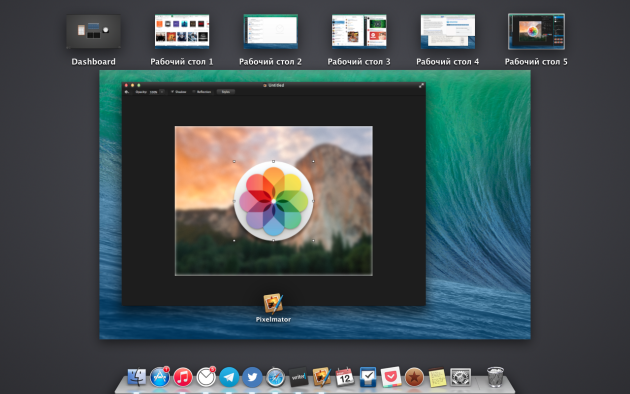
Here are the working tables for me: on the first iTunes and Mac App Store, on the second – mail, on the third – Telegram and Twitter, on the fourth – Safari and Writer Pro, on the fifth – Pixelmator. It’s enough for me, you can have more or less of them. Here are the moments that you should know about desktops:
- You can add a desktop to the Mission Contorl by calling it with a four-finger up or F3 key, then click on the “plus” in the upper right corner of the screen
- You can switch between tables by the same four-finger gesture, only to the left and to the right or by using the combination of keys [Ctrl] + [←] and [Ctrl] + [→]
- you can quickly switch to the last open desktop by making a svayp in his direction and go back by swiping in the opposite direction
Use full-screen application mode
There is nothing wrong with using the entire screen space for one application. For example, if you work in a text editor, then unfolding it on the whole screen, you get rid of distractions and focus on your task. This method is not suitable for all applications, but still it can be used in most cases. Full-screen mode is present in almost all applications, so do not forget to use it!
Effectively use Dock
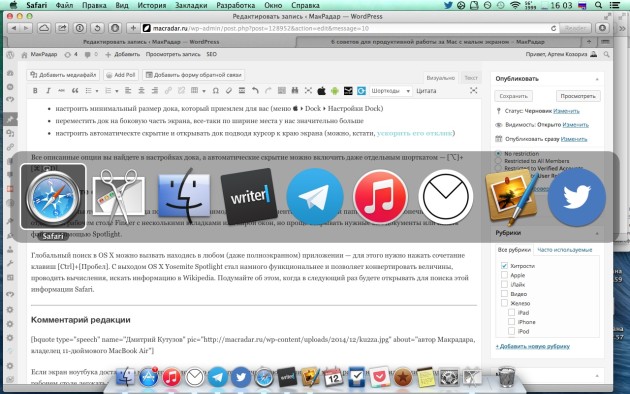
Dock is an exclusive and very handy feature of OS X. With its help it’s very convenient to switch between applications and open documents, but the minus of the dock is that it takes away the precious screen space, which is small in widescreen 11- and 13-inch displays . Here we have two options, or rather three:
- set the minimum size of the dock that is acceptable for you (menu ▸ Dock ▸ Dock Settings)
- To move the dock to the side of the screen, after all the width of the place we have much more
- set automatic hiding and open the dock by bringing the cursor to the edge of the screen (you can, incidentally, speed up its response)
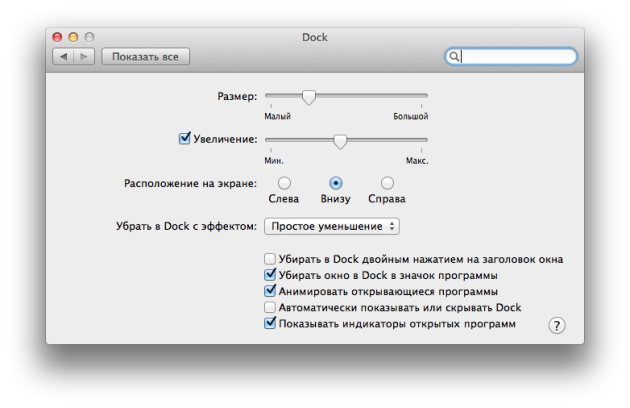
All the options described are found in the dock settings, and automatic hiding can be included even with a separate shortcut – [⌥] + [⌘] + [D].
Do not forget about Spotlight
Working with a computer almost always involves interacting with documents, files and folders. You can of course keep the Finder on its own desktop with several tabs or a pair of windows, but it’s easier to open the documents you need or search for files using Spotlight.
Global search in OS X can be accessed from any (even full-screen) application – by pressing [Ctrl] + [Space]. With the release of OS X, Yosemite Spotlight has become much more functional and allows you to convert quantities, perform calculations, and search for information in Wikipedia. Think about this when the next time you open Safari to find this information.
Tune with three fingers
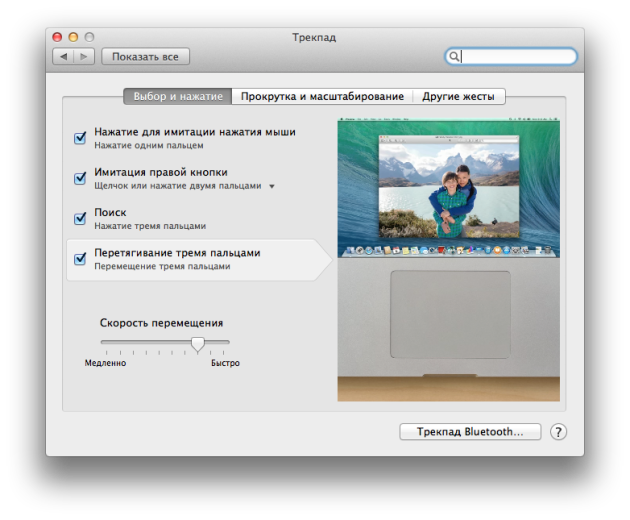
Little MacBook has not only a small screen, but not such a large trackpad. Therefore, it is complicated by such a frequently used operation as drag and drop, which we use to extract text, drag and drop objects, and in many other cases. By default, it, like a normal mouse, is performed by pressing and moving a finger, but it can be reassigned to a three-finger gesture. To do this, open the trackpad settings and check the corresponding box.
Editor’s comment
If the screen of the laptop is small enough due to its ergonomics, then too many different applications on one desktop can be extremely inconvenient. The most important thing is to work with one application at a time. In the same way, as on iOS – one application occupies the entire workspace. This not only focuses work on one thing, but also minimizes the use of scrolling.
In other words: if you opened Mail – deploy it to the entire workspace. Skype, Finder, iTunes – similarly. If you use a MacBook as a home and work computer at the same time, you can make a second desktop. On the first place the applications with which you work at home, and on the second – those that you use at work. At me the second desktop, for example, occupies completely unfolded Parallels Desktop with Windows 10. So I can switch from one OS on another simple with four fingers. And each of the working tables serves its purpose.